Friday, 18 May 2012

publish infopath form in sharepoint 2010

Step 1) Run InfoPath 2010
Step 2) Select Blank Template--> double click on it
Step 3) replace title with some text   then click "Data"-->"From Other Sources"-->"From Database"

Step 4) Click on "Select Databases"--> if no database connection exists-->click on "New data source"

Then select "Microsoft SQL Server"-->click on Next>
enter sql-server name, choose authentication type as windows/provide user name & password.
Select  AdventureWorksLT   database--> then select "Customers" table--> Click Next->then click Next--> FINISH
After finish the following screen will appear


select  "store a copy of the data in the form template".--> click Next
take all defaults--> Then press FINSIH button. The following step will appear, in that Fields--> select Customer(secondary) as shown below.


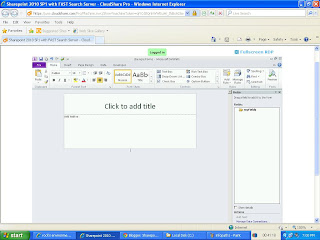
Expand myfields-->dataFields-->d:customer--> click Repeat Table->drag & drop on left side
Thursday, 17 May 2012

flash player in sharepoint


Add content editor webpart 
edit webpage , click on insert --> select Web parts"-->  media & content--> content editor webpart


save following text in some file & upload it do document library.


<object type="application/x-shockwave-flash" width="400" height="220"
wmode="transparent" data="flvplayer.swf?file=movies/holiday.flv">
<param name="movie" value="flvplayer.swf?file=movies/holiday.flv" />
<param name="wmode" value="transparent" />
</object>

give text file link in content editor

create external content type sharepoint 2010

Step 1)  Open  site in  Sharepoint Designer

Step 2) Click on External Content Type
      Change Name --> customers
         Display Name also   same
Office Item TYpe --> Generic List
Offline Sync for external list --> Enabled

Step 3)  Click on "Click here to discover external ...."

Click on "Add Connection" button --> select SQL-server from combo box

enter   database server name, db name  as shown below
Expand on Tables 
Select Customers table
Right click on Customers Table as shown below 
click on "Create All Operations"


Click on Next>> following screen will appear
In This CustomerID is  Primary of the Table Customer , so select "Show in Picker"(based on this primary key rows will be updated/deleted etc.,).

CLick Next>>  (No filter parameters)--> click FINISH
Following screen comes Click on Save button
Note: right side shows "External Content Type Operations", because user selected all operations
means get all,read one/item, insert,update,&delete
Click on Save button -->  and then click on External Content Type
following screen will appear


Now Goto  Browser  click on "Site Actions"--> "More Options" --> select "List" --> select "External List"
as shown below


                Then click on "Create" button(right side) following screen will appear
enter some name here mycustomerexternal, desc etc.,


click on External content type as shown figure,  following screen will appear
select "customer" external type  --> click on OK.  following screen will come

Click on Create button

Wednesday, 16 May 2012

create content type in sharepoint 2010


            SPSite site = new SPSite("http://sp2010:21016");
            SPWeb web = site.RootWeb;
            //SPWeb web = site.OpenWeb();
            //foreach (SPContentType ct in web.ContentTypes)
            //{
            //    Console.WriteLine(ct.Name+"\t-->"+ct.Group);
            //}
            //return;
            SPContentTypeId contentTypeID = SPBuiltInContentTypeId.Item;
            SPContentType cType = new SPContentType(web.ContentTypes[contentTypeID],
                web.ContentTypes, "SalesCT1");
            cType.Description = "Sales data content type";
            cType.Group = "Company-Sales-Data";
            cType.Sealed = true;
            cType.Hidden = false;
            web.ContentTypes.Add(cType);
         
//adding 4 fields 1.sales man 2.yr 2005,2006,2007

          string fieldname=web.Fields.Add("Sales Man", SPFieldType.Text, false);
//first add to web field collection then link to content type.
           SPField field= web.Fields.GetField(fieldname);
           SPFieldLink fieldLink = new SPFieldLink(field);
           cType.FieldLinks.Add(fieldLink);

           fieldname = web.Fields.Add("2005", SPFieldType.Number, false);
           field = web.Fields.GetField(fieldname);
           fieldLink = new SPFieldLink(field);
           cType.FieldLinks.Add(fieldLink);

            fieldname = web.Fields.Add("2006", SPFieldType.Number, false);
           field = web.Fields.GetField(fieldname);
           fieldLink = new SPFieldLink(field);
           cType.FieldLinks.Add(fieldLink);

           fieldname = web.Fields.Add("2007", SPFieldType.Number, false);
           field = web.Fields.GetField(fieldname);
           fieldLink = new SPFieldLink(field);
           cType.FieldLinks.Add(fieldLink);

           
            cType.Update();

SharePoint list templates

SharePoint 2010 list templates

List Type --> List Name

DocumentLibrary -->Document Library
XMLForm -->Form Library
WebPageLibrary  -->Wiki Page Library
PictureLibrary  -->Picture Library
Links   -->Links
Announcements   -->Announcements
Contacts        -->Contacts
Events  -->Calendar
DiscussionBoard -->Discussion Board
Tasks   -->Tasks
GanttTasks      -->Project Tasks
IssueTracking   -->Issue Tracking
GenericList     -->Custom List
CustomGrid      -->Custom List in Datasheet View
ExternalList    -->External List
Survey  -->Survey
DataConnectionLibrary   -->Data Connection Library
10102   -->Converted Forms
851     -->Asset Library
DataSources     -->Data Sources
433     -->Report Library
NoCodeWorkflows -->No Code Workflows
432     -->Status List
WorkflowHistory -->Workflow History
2100    -->Slide Library
WorkflowProcess -->Custom Workflow Process
NoCodePublic    -->No Code Public Workflows
850     -->Pages Library
Press any key to continue . . .

document templates in sharepoint 2010


Sharepoint 2010 document template types 

Document  Template Name    and TYPE

None                    --->100
Microsoft Word 97-2003 document                 --->101
Microsoft Excel 97-2003 spreadsheet                     --->103
Microsoft PowerPoint 97-2003 presentation                       --->104
Microsoft Word document                 --->121
Microsoft Excel spreadsheet                     --->122
Microsoft PowerPoint presentation                       --->123
Microsoft OneNote 2010 Notebook                 --->111
Microsoft SharePoint Designer Web page                  --->102
Basic page                      --->105
Web Part page                   --->106
Microsoft InfoPath form                 --->1000


Sunday, 13 May 2012

Chart Webparts in Sharepoint 2010

Step 1)  Add Graph Webpart as shown below


Step 2) Right click Choose connect to data
             choose data sources as List
            Select    List  in this case sales-data


Creating Connectable Web Parts in SharePoint Foundation

Step1) Create Sharepoint Project using Visual Studio 2010
              1) select .net framework 3.5
              2)select empty project

Step2)  Add 2 webparts
                 1.Consumer WebPart
                 2.Provider Webpart
Step3)  add common interface inorder to share information between webparts(i.e consumer & provider)

Step 4) Deploy the Project

Step5) create new "WebPart" page.  wikipage doesn't provide connecting weparts.


Example
         
Provider webpart code.


filename:
ProviderWp.cs


using System;
using System.ComponentModel;
using System.Web;
using System.Web.UI;
using System.Web.UI.WebControls;
using System.Web.UI.WebControls.WebParts;
using Microsoft.SharePoint;
using Microsoft.SharePoint.WebControls;


namespace connwp_demo.ProviderWp
{
    [ToolboxItemAttribute(false)]
    public class ProviderWp : WebPart,IProvConsBridge
    {
        TextBox box = new TextBox();
        String _text = string.Empty;
        Button btn = new Button();
        protected override void CreateChildControls()
        {
            box.Text = "This info will be passed to Consumer";
            this.Controls.Add(box);
            btn.Text = "Send Data";
            this.Controls.Add(new System.Web.UI.LiteralControl("<br/>"));
            btn.Click += new EventHandler(btn_Click);
            this.Controls.Add(btn);
        }


        void btn_Click(object sender, EventArgs e)
        {
            _text = box.Text;
            box.Text=string.Empty;
        }


        public string Message
        {
            get
            {
                return _text;
            }
            set
            {
                _text = value;
            }
        }
        [ConnectionProvider("Conn provider")]
        public IProvConsBridge ProviderInfo()
        {
            //this.Message = box.Text;
            return this;
        }
    }
}

Consumer Webpart Code

filename:ConsumerWp.cs
using System;
using System.ComponentModel;
using System.Web;
using System.Web.UI;
using System.Web.UI.WebControls;
using System.Web.UI.WebControls.WebParts;
using Microsoft.SharePoint;
using Microsoft.SharePoint.WebControls;

namespace connwp_demo.ConsumerWp
{
    [ToolboxItemAttribute(false)]
    public class ConsumerWp : WebPart
    {
        IProvConsBridge bridge;
        Label lbl = new Label();
        protected override void CreateChildControls()
        {
            lbl.Text = "info updated by provider";
            this.Controls.Add(lbl);
        }

        protected override void OnPreRender(EventArgs e)
        {
            EnsureChildControls();
            if (bridge != null)
            {
                lbl.Text = bridge.Message;
            }
        }

        [ConnectionConsumer("consumer")]
        public  void GetProvider(IProvConsBridge fromp)
        {
            bridge = fromp;
        }
    }
}


common interface code (it must be an interface, because .NET doesn't support multiple inheritance).  interface must be public

filename:IProvConsBridge.cs

using System;
using System.Collections.Generic;
using System.Linq;
using System.Text;

namespace connwp_demo
{
    public interface IProvConsBridge
    {
        String Message{get;set;}
    }
}


Deploy the Solution


Create "WebPart" page ,  wikipage don't not support connecting webparts, but supports individual webparts.


add webparts to a page.  1) ProviderWp  2) consumer Webpart

OUTPUT:


Message: Unhandled Error in Silverlight Application Invalid cross-thread access


Webpage error details

User Agent: Mozilla/4.0 (compatible; MSIE 7.0; Windows NT 6.1; WOW64; Trident/5.0; SLCC2; .NET CLR 2.0.50727; .NET4.0C; .NET4.0E; .NET CLR 3.5.30729; .NET CLR 3.0.30729; InfoPath.3)
Timestamp: Mon, 14 May 2012 03:12:18 UTC


Message: Unhandled Error in Silverlight Application Invalid cross-thread access.   at MS.Internal.XcpImports.CheckThread()
   at MS.Internal.XcpImports.MessageBox_ShowCore(String messageBoxText, String caption, UInt32 type)
   at System.Windows.MessageBox.ShowCore(String messageBoxText, String caption, MessageBoxButton button)
   at System.Windows.MessageBox.Show(String messageBoxText)
   at SilverlightApplication5.MainPage.Succeeded1(Object sender, ClientRequestSucceededEventArgs args)
   at Microsoft.SharePoint.Client.ClientRequest.ExecuteQueryGetResponseAsyncCallback(IAsyncResult asyncResult)
   at System.Net.Browser.BrowserHttpWebRequest.<>c__DisplayClassd.<InvokeGetResponseCallback>b__b(Object state2)
   at System.Threading.QueueUserWorkItemCallback.WaitCallback_Context(Object state)
   at System.Threading.ExecutionContext.Run(ExecutionContext executionContext, ContextCallback callback, Object state, Boolean ignoreSyncCtx)
   at System.Threading.QueueUserWorkItemCallback.System.Threading.IThreadPoolWorkItem.ExecuteWorkItem()
   at System.Threading.ThreadPoolWorkQueue.Dispatch()
   at System.Threading._ThreadPoolWaitCallback.PerformWaitCallback()
Line: 1
Char: 1
Code: 0
URI: http://sp2010:21016/SitePages/silverlight1.aspx?PageView=Shared&InitialTabId=Ribbon.WebPartPage&VisibilityContext=WSSWebPartPage

Silverlight in Sharepoint 2010 webpart

Step 1) Create Silverlight project using Visual Studio 2010

Step2) Add Sharepoint Silverlight dll Reference  

located in
 %ProgramFiles%\Common Files\Microsoft Shared\web server extensions\14\TEMPLATE\LAYOUTS\ClientBin


1)Microsoft.SharePoint.Client.Silverlight.dll
2) Microsoft.SharePoint.Client.Silverlight.Runtime.dll


Step 3)   Add  DataGrid & button to xaml file


    <Grid x:Name="LayoutRoot" Background="White">
        <sdk:DataGrid AutoGenerateColumns="True" Height="92" HorizontalAlignment="Left" Margin="10,10,0,0" Name="dataGrid1" VerticalAlignment="Top" Width="378" />
        <Button Content="Get List Data" Height="34" HorizontalAlignment="Left" Margin="10,120,0,0" Name="GetListData" VerticalAlignment="Top" Width="211" Click="GetListData_Click" />
    
Step 4) Add Button event handler 

in the button event handler.
 //1. get current context
 //2. get web on which silverlight xap file runs
//3. get perticular list in that web
//4. load all items in the list
//silverlight only supports asynchronous mechanism, so load with ExecuteQueryAsync    
   
  private void GetListData_Click(object sender, RoutedEventArgs e)
        {
             ctx = ClientContext.Current;
             currentWeb=ctx.Web;
            ctx.Load(currentWeb);
            list=currentWeb.Lists.GetByTitle("Sales-Details");//get Sales-details custom list
            //query all items in the list.
            CamlQuery query = CamlQuery.CreateAllItemsQuery();
            allItems=list.GetItems(query);
            ctx.Load(allItems);


            ctx.ExecuteQueryAsync(successEventHandler, FailedEventHandler);


        }


        void FailedEventHandler(object sender, ClientRequestFailedEventArgs args)
        {
        }

       //On success this method gets executed.

        void successEventHandler(object sender, ClientRequestSucceededEventArgs args)
        {
           //Bind datagrid asynchronously with delegate
            Action a = new Action(UpdateGrid);
            this.Dispatcher.BeginInvoke(a);
        }

        void UpdateGrid()
        {
            foreach(ListItem item in allItems)
            {
                PurchaseOrder oRder = new PurchaseOrder { TITLE= item["Title"].ToString()};

                poList.Add(oRder);
                
            }

            dataGrid1.ItemsSource = poList;
        }

Step 5) Add a class  PurchaseOrder  with single property in that

namespace SilverlightApplication2
{
    public class PurchaseOrder
    {
        private string Title;

        public string TITLE
        {
            get { return Title; }
            set { Title = value; }
        }

    }
}

Step 6) If user has more columns/fields in the list then add corresponding properties in PurchaseOrder class
           and samething in UpdateUI method.

Step 7)  Build the Silverlight Project,
              .XAP file will be generated.

Step 8) Upload generated .xap file into document library .
             in this example: http://sp2010:22913/sites/sc2/doclib/SilverlightApplication2.xap
           SilverlightApplication2.xap uploaded to doclib --> document library.

Step 9)   Create a Web page,   insert Silverlight Web part
              note: Silverlight Web part located in   "Media & Content"-->Silverlight Web part.

Step 10)  The following Output will generate
                            Figure1) Empty data Grid
 After button click, actual data in the list will be displayed.


Complete Sample Code in  MainPage.xaml.cs


using System;
using System.Collections.Generic;
using System.Linq;
using System.Net;
using System.Windows;
using System.Windows.Controls;
using System.Windows.Documents;
using System.Windows.Input;
using System.Windows.Media;
using System.Windows.Media.Animation;
using System.Windows.Shapes;
using Microsoft.SharePoint.Client;
using Microsoft.SharePoint.Client.Utilities;
namespace SilverlightApplication2
{
    public partial class MainPage : UserControl
    {
        ClientContext ctx = null;
        Web currentWeb = null;
        ListItemCollection allItems = null;
        List list = null;
        System.Collections.Generic.List<PurchaseOrder> poList =
            new List<PurchaseOrder>();
        public MainPage()
        {
            InitializeComponent();
        }


        private void GetListData_Click(object sender, RoutedEventArgs e)
        {
             ctx = ClientContext.Current;
             currentWeb=ctx.Web;
            ctx.Load(currentWeb);
            list=currentWeb.Lists.GetByTitle("Sales-Details");
            CamlQuery query = CamlQuery.CreateAllItemsQuery();
            allItems=list.GetItems(query);
            ctx.Load(allItems);


            ctx.ExecuteQueryAsync(successEventHandler, FailedEventHandler);


        }


        void FailedEventHandler(object sender, ClientRequestFailedEventArgs args)
        {
        }
        void successEventHandler(object sender, ClientRequestSucceededEventArgs args)
        {
            Action a = new Action(UpdateGrid);
            this.Dispatcher.BeginInvoke(a);
        }


        void UpdateGrid()
        {
            foreach(ListItem item in allItems)
            {
                PurchaseOrder oRder = new PurchaseOrder { TITLE= item["Title"].ToString()};


                poList.Add(oRder);
                
            }


            dataGrid1.ItemsSource = poList;
        }


    }
}

Web Part Verbs in SharaPoint 2010

Step 1)  Add new web part .and in webpart class.

add following code


        public override WebPartVerbCollection Verbs
        {
            get
            {
                WebPartVerb clientside = new WebPartVerb("CLienSide1", "<script>alert('webpart verb  using javascript');</script>");
                clientside.Text = "ClientSide WebPart";
                List<WebPartVerb> ListVerbs = new List<WebPartVerb>();
                ListVerbs.Add(clientside);
                WebPartVerbCollection coll = new WebPartVerbCollection(ListVerbs);
                return coll;
            }
       
        }

Saturday, 12 May 2012

Web Part in Sharepoint 2010-AJAX based Timer Web Part

Step 1)   Create Silverlight Project using Visual Studio 2010,(see article)
Step 2) Add  new item->select Webpart  name its "TimerWp"
Step 3)   open TimerWp.cs

Replace with  following code
FileName:TimerWp.cs
using System;
using System.ComponentModel;
using System.Web;
using System.Web.UI;
using System.Web.UI.WebControls;
using System.Web.UI.WebControls.WebParts;
using Microsoft.SharePoint;
using Microsoft.SharePoint.WebControls;

namespace SharePointProject1.TimerWp
{
    [ToolboxItemAttribute(false)]
    public class TimerWp : WebPart
    {

        Label lblTime = new Label();
        UpdatePanel updatePanel = new UpdatePanel();
        Timer t = new Timer();
        protected override void CreateChildControls()
        {
            lblTime.Text = "Time will be updated by Timer";
            t.Interval = 1000;//1000 milli seconds
            t.Tick += new EventHandler<EventArgs>(t_Tick);

            //Add controls to WebPart zone container.
            updatePanel.ContentTemplateContainer.Controls.Add(lblTime);
            updatePanel.ContentTemplateContainer.Controls.Add(t);
            this.Controls.Add(updatePanel);
        }

        void t_Tick(object sender, EventArgs e)
        {
            lblTime.Text = System.DateTime.Now.ToLongTimeString();
        }
    }
}
Step 3)  Deploy the Solution

Step 4) Add Ajax Timer Webpart to a Site.,

OUTPUT


Thursday, 3 May 2012

SharePoint Tutorials 2010

Sharepoint is a Content Management, Document Management tool, and also Easily create Collaborative Websites.