Thursday, 7 June 2012

Add Event Receivers to List Item in Sharepoint 2010


List Item Events--> Site Collection Administrators only Perform Add/Update/Delete other users can't.


Step 1) Create  Empty SharePoint 2010 project using .NET 3.5
                 Enter site URL  and select  "Deploy as Farm Solution"

Step 2)   Select  Project --> Right click on it--> Select "Add New Item"-->following dialog box will appear.
  in that select "Event Receiver"  and name it as "ListEvt1"
as shown below

Click on "Add"

Step 3)    It will show following screen
               select  1. List Item Events
                          2.Custom List
                          3.User cannot add items,update items & delete items.

as shown below


Click on FINSIH

Step 4)  The following class(ListEvt1  derived from SPItemReceiver) will be Generated,.  with ItemAdding, itemUpdating,itemDeleting


       public override void ItemAdding(SPItemEventProperties properties)
       {
           web = properties.OpenWeb();
           if (properties.List.Title == "purchaseOrder")
           {
               if (!web.UserIsSiteAdmin)
                   properties.Cancel = true;
           }
       }
       public override void ItemUpdating(SPItemEventProperties properties)
       {
           web = properties.OpenWeb();
           if (properties.List.Title == "purchaseOrder")
           {
               if (!web.UserIsSiteAdmin)
                   properties.Cancel = true;
           }
           
       }
       public override void ItemDeleting(SPItemEventProperties properties)
       {
           web = properties.OpenWeb();
           if (properties.List.Title == "purchaseOrder")
           {
               if (!web.UserIsSiteAdmin)
                   properties.Cancel = true;
           }

       }


Step 5)  Deploy the Solution.

Note: If User is  Site Collection Administrator,  Then only user can add/update/delete records, for other users the following error message will be displayed,

Wednesday, 6 June 2012

Add New Content Database to SharePoint 2010 Web Application

Step 1)   Go to "Central Administration"-->Click on "Application Management"--> Under Database section-> Click on "Manage Content Databases"--> click on "Add Content Databases"--> Enter details.database name, server ect.,

Step 2) Create Site collection on New Content Database
before that remaining content databases should be brought to "Offline".

Step 3) Click on "Content database name" --> Change Database Status to "Offline"

Step 4)   Now the First Content Database Status is  "Stopped"
   content database list as shown below

Step 5)  Now click on  Application Management(in Central Administration)--> Under Site Collections-> Create Site Collection-->

Select  appropriate "Web Application"  as u did in Step 1)
Enter some title,desc, Enter site collection URL, enter administrator name ,leave remaining things as default.
Click on OK

Step 6)  Now goto "Application Management"--> Under Databases section--> Click on "Manage Content Databases" -->select appropriate Web Application. in this case http://sp2010:27657


First Content Database "WSS_Content"   has  3 site collections
Second Content Database "WSS_Content_Contentdb2" has 1 site collection.

Note: Once new site collection created, first content database can be made "Online".

All new site collection data will be stored in content database, which is online,at the time of creation.

User can Query using Server Object Model--> Web Application,and their content database using
following link Query WebApplications & their content Databases ....

Tuesday, 5 June 2012

Site WorkFlows in Sharepoint 2010

Step 1)  Open SharePoint Designer
          

Group By in Sharepoint List

Step 1)  Create a Custom List called "Student-Grade" with the following Data
              Step 2)  Goto List Settings--> Views--> "All Items"--> Group By option in that select  Grade column as shown below
  Click OK

OUTPUT 
         

Monday, 4 June 2012

enable inline editing sharepoint 2010

Step 1) Goto List Settings
Step 2) Click on All Items View
Step 3)   select inline Editing as shown below
  Step 4) Click OK

Step 5)   After Enabling inline edit  list item will look like this.(instead on popup dialog box, edit boxes will appear for each field) as shown below

Hide/remove Title Field in SharePoint list


Here are the steps required to hide the Title column:
  1. From the list view click Settings->List Settings

  1. On the Settings Screen, under the ‘General Settings’ heading, click ‘Advanced Settings’
  2. On the Advanced Settings screen click ‘Yes’ for the value: ‘Allow Management of Content Types?’
  3. Click ‘OK’
  4. Now, back on the Settings Screen, under the ‘Content Types’ heading, click ‘Item’
  5. On the Content Type Management Screen, under the ‘Columns’ section, click on the ‘Title’ column
  6. On the next screen click the radio button for ‘Hidden (Will not appear in forms)’
  7. Click ‘OK’
  8. Now goto "All Items" View--> uncheck  Title field.


Import SpreadSheet in SharePoint 2010

Step 1) Select Import SpreadSheet template in Sharepoint site as shown below
        Click on Create
Step 2)   Enter Name, Desc, Select excel file located in Harddisk as shown below
         
Step 3) Click on "Import" --> Excel  file will be opened
             in Excel Sheet  in first arrow -->select Range of Cells
                                    in Second Arraow -> click on it ,it will allow user to select Excel sheet range
Select the range by pressing Shift from starting cell A1 to D4

Range will appear shown in first arrow then click on second arrow
Then click on "Import"


List will be created in Sharedpoint site as shown below.
Name =SalesDetails with data.

Excel Web Parts in sharepoint 2010

Step 1) Create new Page in Sharepoint site. name it as ExcelDemo.aspx
Step 2)  Create new Excel Sheet & upload it to Shared-Document Library
         
Step 3)  Select Sales man data & name it as "SalesDetails"(shown above)
Step 4) In Excel Sheet, Insert Bar Graph  for sales man details.  By default Chart has Name "Chart 1"

Step 5) Now goto ExcelDemo.aspx page --> Edit mode --> Insert 2 Webpart
            1 Excel Web Access  for salesmandetails pivot table
             second one for graph i.e chart 1


Step 6) After inserting 2 excel web parts, the page(ExcelDemo.aspx) will look like this

Step 7)  Now click on "Click here to open tool pane"

Step 8)   Now select  Sales-data.xlsx  located in Shared-Documents
             and in the  Named Items type "Chart 1"  as shown below

Click OK in first excel webpart

Repeat the samething for second webpart
                               in the "named Item"  type  "SalesDetails"--> Click OK

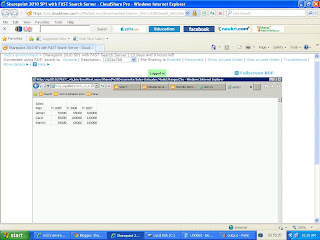
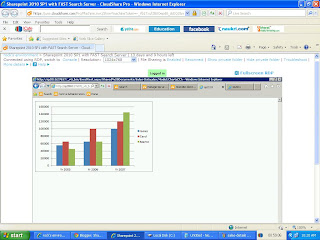
Now OUTPUT will look like this.

Use Excel Rest API in SharePoint 2010

Step 1)  Upload following .xlsx file to  ShareDocument Library in Share Point site
  Select  A1-D4 cells  name it as SalesDetails(Shown in arrow 1)
   By default Graph has  "Chart 1" as name, leave it.

Step 2) Upload this Excel Sheet to  Document Library
Step 3)  Calling Excel REST API  to access Sales-Details.xlsx file stored in document library

               3.1) Using Excel Rest API  , access SalesDetails pivot table
               3.2) Using Excel Rest API, access only Chart display in WebPage/Browser.

Step 4)  Using Excel REST API.
                   in C:\Program Files\Common Files\Microsoft Shared\Web Server Extensions\14\ISAPI  folder
          There is a file called "ExcelRest.aspx"  which is used to access Excel files in Sharepoint site,

         Using Excel Rest API  , access SalesDetails pivot table
       to Access ExcelRest.aspx  
                type site address http://sp2010:27567/_vti_bin/ExcelRest.aspx


So to Access Sales-Details.xlsx stored in Shared-Document Library 
http://sp2010:27567/_vti_bin/ExcelRest.aspx/Shared%20Documents/Sales-Data.xlsx/Model


just append  Shared%20Documents/Sales-Data.xlsx/Model


it will return  atom xml shown below format 


Accessing pivottable SalesDetails
http://sp2010:27657/_vti_bin/ExcelRest.aspx/Shared%20Documents/Sales-Data.xlsx/Model/Ranges('SalesDetails')?format=HTML


just append Ranges('SalesDetails')?$format=HTML


               3.2) Using Excel Rest API, access only Chart display in WebPage/Browser.

http://sp2010:27657/_vti_bin/ExcelRest.aspx/Shared%20Documents/Sales-Data.xlsx/Model/Charts('Chart 1')?$format=image

just append Charts('Chart 1')?$format=image

Publish Excel Sheets to SharePoint 2010

Step 1)  Create Excel file with two sheets
            in Sheet1 

in Sheet 2
               
Step 2)  Publish to SharePoint
                 (Assuming Excel Service is added to Website & service is up&running)
Click on "Save to SharePoint"->Click on "Save As"         
Step 3)  Enter ur website  address  in this case http://sp2010:27657/Shared Documents/
              Iam going to publish to Shared Documents in Sp2010:27657 site.

Step 4) Now goto  http://sp2010:27657/Shared Documents/
              Sales-details.xlsx will appear
     
Step 5)  It should be added to Trusted Location in Central Administration, so that user can open/access the data.,

Step 6) Goto Central Administration --> click on "Application Management"-->Manage Service Applications(Under Service Applictaions)--> Click on "Excel Service Application"--> Click on "Trusted File Location-->

//Add site address itself. so that excel can be published any document library in that site.
//so  address is http://sp2010:27657
//Check  "Children Trusted"  i.e it trusts all document libraries in the Site.
//Leave remaining all default
//CLick OK


Step 7) Now goto Site http://sp2010:27657
 Click on   Sales-Data.xlsx in Shared-Document library.

Step 8) Output  ,  Sales-data.xlsx will be opened in Browser. As shown below


Sunday, 3 June 2012

Silverlight Graph using SharePoint List 2010

Assuming SharePoint Site(http://sp2010:22913/sites/sc2/) has following List called  "Programming-Languages"(as shown below)


Step1) Create Silverlight project using .Net 3.5 (GRAPHDEMO)

Step 2)  Add Sharepoint Silverlight dll reference
             Located in 
             %ProgramFiles%\Common Files\Microsoft Shared\web server extensions\14\TEMPLATE\LAYOUTS\ClientBin 

            1)Microsoft.SharePoint.Client.Silverlight.dll 
            2) Microsoft.SharePoint.Client.Silverlight.Runtime.dll 


Step 3)  Add reference System.Windows.Controls.DataVisualization.Toolkit.


Step 4)  Add another namespace in MainPage.xaml for charting
           xmlns:chartingToolkit="clr-namespace:System.Windows.Controls.DataVisualization.Charting;assembly=System.Windows.Controls.DataVisualization.Toolkit"


Step 5) Drap & drop  Chart Control into MainPage.xaml


        <chartingToolkit:Chart  x:Name="Chart1" HorizontalAlignment="Left" Margin="10,10,0,0"  Title="Programming Language Usage" VerticalAlignment="Top" Height="225" Width="390">
            <chartingToolkit:ColumnSeries DependentValuePath="Usage"  ItemsSource="{Binding}"
                                          IndependentValuePath="Name" 
                                           AnimationSequence="FirstToLast"
                                            IsSelectionEnabled="True"
                                          >
            </chartingToolkit:ColumnSeries>
        </chartingToolkit:Chart>

Step 6) Add new class ProgramUsage.cs
  it has 2 properties , 1 for Programming Language 2 for Usage
public class ProgramUsage
    {
        public string Name { get; set; }
        public int Usage { get; set; } 
    }

Step 7)    Add following varibles to  MainPage.xaml.cs

        ClientContext ctx = null; //sharepoint client context
        Web web = null;  //web
        List list = null;  //list refernce
        ListItemCollection allItems = null; //lits item collection
        List<ProgramUsage> pUsage= new List<ProgramUsage>(); //list of items parsed added to List of ProgramUsage 


in the constrcutor  ad\fter InitializeComponent() add this
this.Loaded += new RoutedEventHandler(MainPage_Loaded);

Add MainPage_Loaded method and try to get   list asynchronously

        void MainPage_Loaded(object sender, RoutedEventArgs e)
        {
            try
            {
                ctx = new ClientContext("http://sp2010:22913/sites/sc2/");//ApplicationContext.Current.Url);
               // ClientContext.Current;
                
                web = ctx.Web;
                
                ctx.Load(web);
               // ctx.ExecuteQuery();

                list = web.Lists.GetByTitle("Programming-Languages");
                CamlQuery query = CamlQuery.CreateAllItemsQuery();
                allItems
                  = list.GetItems(query);
                ctx.Load(allItems);

                ctx.ExecuteQueryAsync(successEventHandler, FailedEventHandler);
            }
            catch (Exception ex)
            {
                label1.Content = ex.Message;
            }
        }

//Add success,failed delagates methods

        void successEventHandler(object sender, ClientRequestSucceededEventArgs args)
        {
            //Bind datagrid asynchronously with delegate
            Action a = new Action(UpdateGrid);
            this.Dispatcher.BeginInvoke(a);
        }

     //Update chart with delegate/ashynchronously
        void UpdateGrid()
        {
            try
            {
                foreach (ListItem item in allItems)
                {
                    ProgramUsage ProgramL =
                        new ProgramUsage
                        {
                            Name = item["Title"].ToString(),
                            Usage = (item["Usage"] != null) ? System.Convert.ToInt16(item["Usage"]) : 0
                        };
                    
                    pUsage.Add(ProgramL);

                }

                Chart1.DataContext = pUsage;
            }
            catch (Exception ex)
            {
                label1.Content = ex.Message;
                
            }
        }
        void FailedEventHandler(object sender, ClientRequestFailedEventArgs args)
        {
            label1.Content = args.Message;
        }

Step 8)  BUILD THE PROJECT  GRAPHDEMO.XAP FILE WILL BE GENERATED.

STEP 9)  DEPLOY SILVERLIGHT .XAP FILE IN SHAREPOINT
               Upload generated .xap file into document library .
 in this example: http://sp2010:22913/sites/sc2/doclib/GRAPHDEMO.XAP
            GRAPHDEMO.XAP  uploaded to doclib --> document library.

STEP 10)  Create a Web page IN SHAREPOINT SITE,   insert Silverlight Web part
              note: Silverlight Web part located in   "Media & Content"-->Silverlight Web part.


STEP 11)   In Silverlight webpart, it asks for .xap file path
                  give same path  in Step 9)

Step 12)  OUTPUT


complete  MainPage.xaml code 

<UserControl x:Class="SilverlightApplication4.MainPage"
    xmlns="http://schemas.microsoft.com/winfx/2006/xaml/presentation"
    xmlns:x="http://schemas.microsoft.com/winfx/2006/xaml"
    xmlns:d="http://schemas.microsoft.com/expression/blend/2008"
    xmlns:mc="http://schemas.openxmlformats.org/markup-compatibility/2006"
    xmlns:chartingToolkit="clr-namespace:System.Windows.Controls.DataVisualization.Charting;assembly=System.Windows.Controls.DataVisualization.Toolkit"
    mc:Ignorable="d"
    d:DesignHeight="400" d:DesignWidth="400" xmlns:sdk="http://schemas.microsoft.com/winfx/2006/xaml/presentation/sdk">


    <Grid x:Name="LayoutRoot" Background="White" Height="346" Width="400">
        <chartingToolkit:Chart  x:Name="Chart1" HorizontalAlignment="Left" Margin="10,10,0,0"  Title="Programming Language Usage" VerticalAlignment="Top" Height="225" Width="390">
            <chartingToolkit:ColumnSeries DependentValuePath="Usage"  ItemsSource="{Binding}"
                                          IndependentValuePath="Name" 
                                           AnimationSequence="FirstToLast"
                                            IsSelectionEnabled="True"
                                          >
            </chartingToolkit:ColumnSeries>
        </chartingToolkit:Chart>
        <sdk:Label  Height="47"   HorizontalAlignment="Left" Margin="0,241,0,0" Name="label1" VerticalAlignment="Top" Width="388" />
        <Button Content="Button" Height="23" HorizontalAlignment="Left" Margin="0,302,0,0" Name="button1" VerticalAlignment="Top" Width="75" Click="button1_Click" />
    </Grid>
</UserControl>


complete MainPage.xaml.cs code
using System;
using System.Collections.Generic;
using System.Linq;
using System.Net;
using System.Windows;
using System.Windows.Controls;
using System.Windows.Documents;
using System.Windows.Input;
using System.Windows.Media;
using System.Windows.Media.Animation;
using System.Windows.Shapes;
using Microsoft.SharePoint.Client;
namespace SilverlightApplication4
{
    public partial class MainPage : UserControl
    {
        ClientContext ctx = null;
        Web web = null;
        List list = null;
        ListItemCollection allItems = null;
        List<ProgramUsage> pUsage= new List<ProgramUsage>();
        public MainPage()
        {
            InitializeComponent();

            this.Loaded += new RoutedEventHandler(MainPage_Loaded);
        }

        void MainPage_Loaded(object sender, RoutedEventArgs e)
        {
            try
            {
                ctx = new ClientContext("http://sp2010:22913/sites/sc2/");//ApplicationContext.Current.Url);
               // ClientContext.Current;
                
                web = ctx.Web;
                
                ctx.Load(web);
               // ctx.ExecuteQuery();

                list = web.Lists.GetByTitle("Programming-Languages");
                CamlQuery query = CamlQuery.CreateAllItemsQuery();
                allItems
                  = list.GetItems(query);
                ctx.Load(allItems);

                ctx.ExecuteQueryAsync(successEventHandler, FailedEventHandler);
            }
            catch (Exception ex)
            {
                label1.Content = ex.Message;
            }
        }

        //On success this method gets executed.

        void successEventHandler(object sender, ClientRequestSucceededEventArgs args)
        {
            //Bind datagrid asynchronously with delegate
            Action a = new Action(UpdateGrid);
            this.Dispatcher.BeginInvoke(a);
        }

        void UpdateGrid()
        {
            try
            {
                foreach (ListItem item in allItems)
                {
                    ProgramUsage ProgramL =
                        new ProgramUsage
                        {
                            Name = item["Title"].ToString(),
                            Usage = (item["Usage"] != null) ? System.Convert.ToInt16(item["Usage"]) : 0
                        };
                    
                    pUsage.Add(ProgramL);

                }

                Chart1.DataContext = pUsage;
            }
            catch (Exception ex)
            {
                label1.Content = ex.Message;
                
            }
        }
        void FailedEventHandler(object sender, ClientRequestFailedEventArgs args)
        {
            label1.Content = args.Message;
        }

        private void button1_Click(object sender, RoutedEventArgs e)
        {
           // MessageBox.Show(web.Context.Url);
            //MessageBox.Show(label1.Content.ToString());
            if (list != null)
            {
                MessageBox.Show("title" + list.Title + list.ItemCount.ToString());
                MessageBox.Show("fields" + list.Fields.Count().ToString());
            }
            else MessageBox.Show("list is null");
        }
    }
}

ProgramUsage.cs

using System;
using System.Net;
using System.Windows;
using System.Windows.Controls;
using System.Windows.Documents;
using System.Windows.Ink;
using System.Windows.Input;
using System.Windows.Media;
using System.Windows.Media.Animation;
using System.Windows.Shapes;

namespace SilverlightApplication4
{
    public class ProgramUsage
    {
        public string Name { get; set; }
        public int Usage { get; set; } 
    }
}

Friday, 1 June 2012

Business Data Connectivity using SharePoint Designer 2010

Step 1)   Open SharePoint Designer 2010, Then Open Site
             in this example: http://sp2010:22913/sites/sc1
            Once u opened site, click on External Content Types--> Then click on "External Content Type"(located in top left corner). as shown below,.

Step 2)    Name External Content Type as MyCustomer, display name also same
Leave remaining things as default.
  Click on "Click here to discover External ..."(as shown in 3rd arrow)

Step 3)   Click on "Add Connection"  --> "Select SQL-Server" as shown in the following figure,

Step 4)   Enter ServerName(localhost)  DataName(AdventureWorksDW2008R2) as shown below

Step 5)  Select  DimCustomers Table --> Right click on it.--> select "Create All Operations"
i.e CRUD-->  Create,Read,Update& Delete.(else User can select individual actions, i.e only Read etc.,)

Step 6)    The following figure shows all operations (user selected in Step 5)

Step 7)  Save &  Again click on "External Content Types"
 The following figure will appear with External Content Type as "MyCustomer"

Step 8) Right click on "MyCustomer" select "External List"
Step 9)   Enter External List Name as "MycustomerExt" and appropriate desc.. as shown below
Step 10)   Goto Browser  --> Click on  "All Site Content"--> Under List --> MyCustomerExt will appear as shown below
Step 11) Goto  "Central Administration"-->"Application Management"-->Service Applications(Click on Manage Service Applications"-->Click on "Business Data Connectivity Service"
The following  screen will come up

Step 12)  Select "MyCustomer" BCS -->  Click on "Set Object Permissions"(The following screen will appear).  Add "Administrator"--> click on Check Names--> Select all permissions Edit,Execute ... etc.,--> Click on OK button.

Step 13) Then Click on Configure  as shown below
Step 14)  Enter Ur site URL
            in this case : http://sp2010:22913/sites/sc1
           Click on OK Button
Step 15)  Select "MyCustomer" BCS--> Click on "Create/Upgrade" -->  Click on OK button

Step 16)  Now goto Website i.e http://sp2010:22913/sites/sc1(Specified in  Step 14)
               Click on Lists->Click on MyCustomerExt